Postgres database OnPrem to Cloud SQL migration
Database Migration Service makes it easier for you to migrate your data to Google Cloud. This service helps you lift and shift your MySQL, PostgreSQL, and SQL Server workloads into Cloud SQL and AlloyDB for PostgreSQL. In addition, you can lift and modernize your Oracle workloads into Cloud SQL for PostgreSQL.
Database Migration Service streamlines networking workflows, manages the initial snapshot and ongoing replication, and provides a status of the migration operations.
With Database Migration Service, you can simplify your migrations. You can start migrating in just a few clicks with a single, integrated migration experience so you can get started with Cloud SQL quickly. In addition, continuous data replication results in minimal downtime while Database Migration Service migrates your data from your source to your destination.
Cloud SQL is a fully-managed database service that helps you set up, maintain, manage, and administer your relational databases on Google Cloud Platform. You can use Cloud SQL with MySQL, PostgreSQL, or SQL Server.
Google Cloud SQL - Advantages:
Enables automatic data encryption
Supports well-built APIs, which ensures easy access
Data replication across locations
Daily automatic backup
Automatic failover (moving an application to a standby Google Cloud SQL server in case an instance fails).
Steps for Migration:-
Configure the Connection Profile
Configure the Migration Jobs.
Verify the Migration.
Make the Replica Node as Primary.
Clean Up.
Prerequisites:-
On-Prem Database should have pglogical extension installed and enabled on each database host by the following Command:
$ PostgreSQL 12: sudo apt-get install postgresql-12-pglogical
Once the installation is completed enable the pglogical extension on your databases:
# CREATE EXTENSION pglogical;
Configurations set on master host’s /etc/postgresql/12/main/postgres.conf file. <number 12 represents version of the postgres installation>
listen_address = ‘<private IP of master>’ #This setting allows you to specify the interface under which the server listens for connections.
wal_level = “logical” #This setting determines how much information is written to the Write Ahead Log(WAL) file.
wal_log_hints = ‘on’ #This allows the PostgreSQL server to write the entire content of each disk page to the WAL file. This helps in the recovery process in case the standby node goes out of sync with the master server.
archive_mode = ’on’ #archiving is the process of creating a backup of all transactions that have occurred in the database so that you can recover the database to any point in time.
Configurations set on master’s /etc/postgresql/12/main/pg_hba.conf file.
Mention the IP which is generated while creating a migration profile in “Create a destination” under replication privilege in master.
Create the replication user with REPLICATION privileges, later, your replica node will use the credentials of the to connect to the master node to fetch replication data.
# CREATE ROLE <EXAMPLE_USER> WITH REPLICATION LOGIN PASSWORD 'EXAMPLE_PASSWORD';
1. Configure the Connection Profile: (GCP dashboard/console)

Configure the Connection Profile, Go to CREATE PROFILE
Choose the Database Engine from which you want to migrate(MySQL, Cloud SQL for MySQL, Amazon RDS for MySQL, PostgreSQL, Amazon RDS for PostgreSQL, Cloud SQL for PostgreSQL).
In this case we use PostgreSQL
Once the Database Engine is selected this type of window will open
Give the <Connection-profile-name>.
Provide the source On-Prem database External/Public IP or Hostname.
Provide the port number on which your On-Prem running database.
Enter the credentials Username and Password of On-Prem Database. (one created with Replication Privileges)
Select the Region.
Select the Encryption type, by default it is none.
Click CREATE
2. Configure the Migration Jobs:

Describe your Migration job
Provide a name to Migration job name
Provide source database Engine
Select Destination Database and Region
Choose Migration Job Type
After providing all information, Click on SAVE & CONTINUE

Now in Define the Source
Select the Source Connection Profile created while Configuring "Connection Profile". (Create as part of step 1)

Now under a "Create a Destination"
Name the Destination Instance ID
Create a password for user postgres
Select suitable Database Version
Chooses Zone

Choose the IP type.
Configure Machine Type, Memory (we can customize the machine configurations by choosing the CUSTOM option, where we can choose the the vCPU, and the Memory/RAM )

Check the Storage type, where SSD is recommended but we can go with the HDD too.
Under Storage Capacity we can go with predefined disk sizes, or can customize as per needed.
Enable automatic storage Increase.
Click on CREATE & CONTINUE.

Under Define Connectivity Method
Select the connectivity Method (IP allowlist, Reverse SSH tunnel via cloud hosted VM, VPC Peering)
After Selecting Connectivity Method click “Configure & Continue”
3.Verify the Migration:

After Completing the migration go to the SQL section, where we can see replica machine
4. Promoting Replica Machine as Primary:

Go to “Migration Jobs” and double click on the running migration job
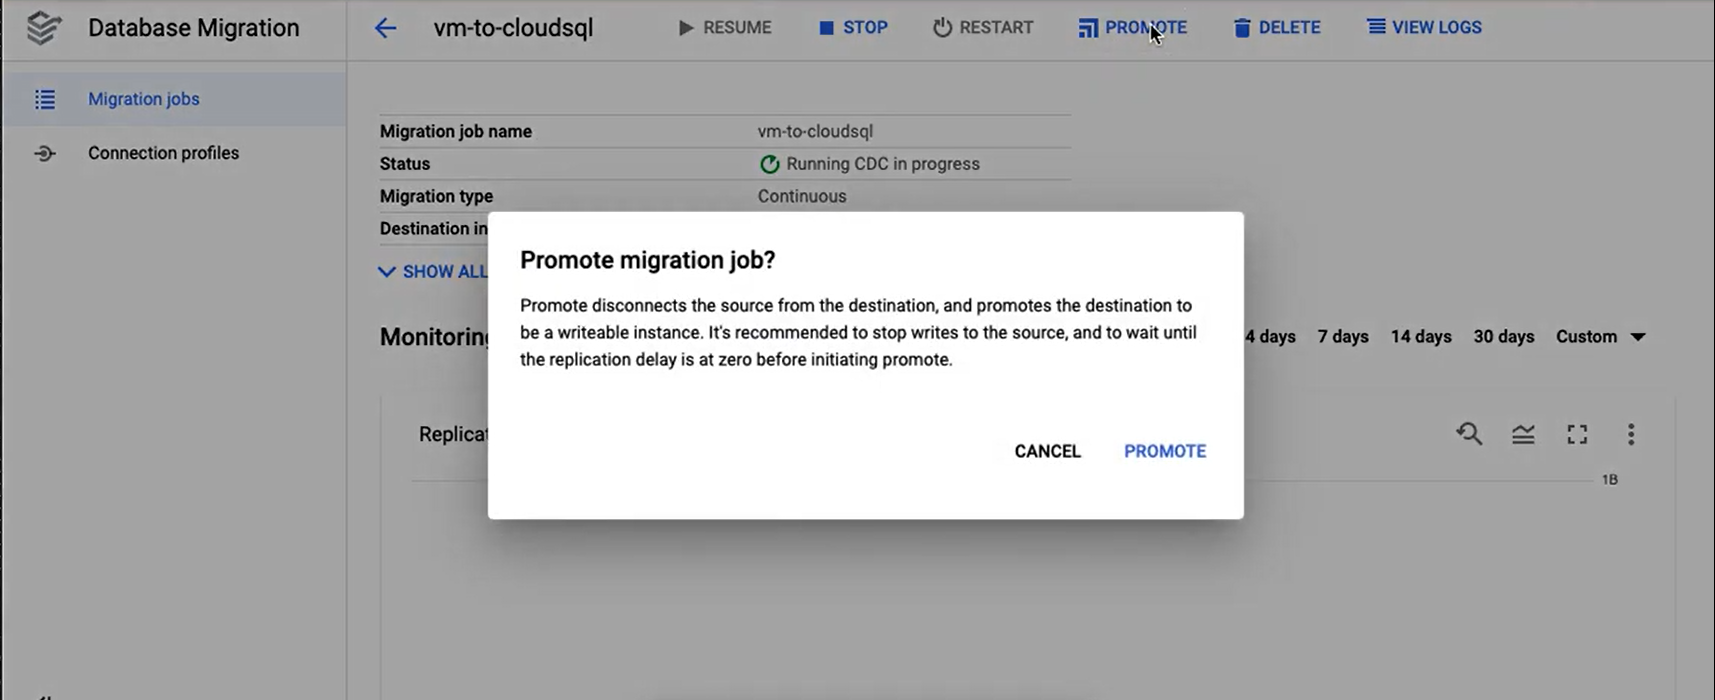
Now click on “PROMOTE”
After PROMOTE it will take some time to change machine to Primary machine, so we can perform read and write operations
5.Clean Up:

Fig. 1: instance is working as a replica(read-only).
Delete the created migration job
Delete the created connection profile

Fig.2: After Promoting instance working as Primary(read-write)

Fig.3: After clean-up(deleting the connection and migration job) the SQl instance is ready to work as Primary.
You can see the difference between all the above images.
Bandwidth consideration:
Migrating data from your current platform over to Google Cloud SQL can be made easier by using a variety of migration tools, each designed for a specific purpose.
For smaller database sizes consider dump and upload over migration jobs. Compression of data on source and uploading it would further reduce bandwidth
For larger and critical databases, you can configure database migration jobs. Perform post migration check and then switch over to cloud sql will have minimum or no downtime.
Conclusion:
Google Cloud SQL helps build relational databases for your cloud-based applications and manages them fully. It offers the capability to create databases using MySql, PostgreSQL, and MySql.
The Cloud service has its ups and downs but promises more than 99.95% availability anywhere across the globe.